Your cart is empty


How to Assemble 200 Series Hose
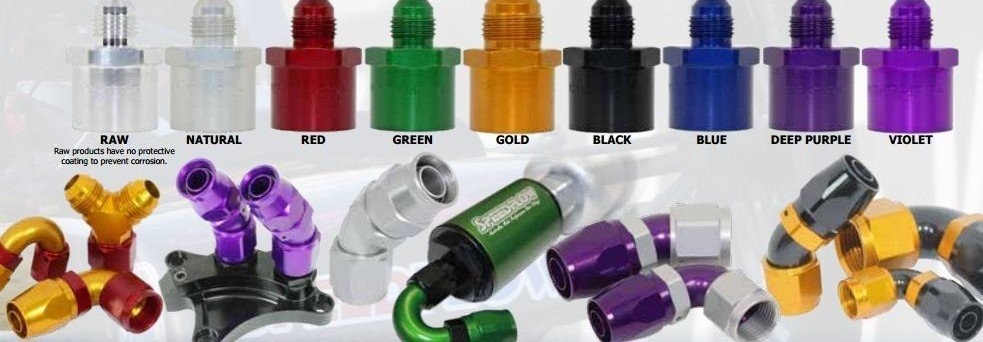
Here are some simple steps to assemble the 200 Series hose and fittings. Speedflows 200 Series hose-ends are made up of three components the main body, the socket and the aluminium olive. Youll need the following tools:
- 200 Series cutters
- Pliers
- Small screwdriver
- Lubricant
- Vice
- Vice jaws
- Open end spanner
Step 1 Select the correct size hose for the fittings and measure to the desired length. This can be cut using the 200 Series cutters. (It can also be cut with a fine-tooth hacksaw or a cut-off blade.) Make sure the cut is square and any residue is trimmed and cleaned. Step 2 Ensure the hose is round by gently squeezing with pliers. At this stage, slide the hose-end socket over the hose and insert the hose-end to check the I.D. is round. Remove the hose-end, take a small flat screwdriver and slowly separate the braid from the O.D. of the Teflon® tube. Take care not to damage the inner tube, you should aim to spread the braid so that the olive slips on easily. Step 3 Take the olive and start the tapered end between the Teflon® and braid. It is very important not to get any strands of braid under the olive as this will cause leaks! Push the olive into the hose against the side of your vice or a strong flat surface. Check that the inner tube is seated and square on the inside step of the olive. Step 4 Place your vice jaws in a vice, secure the hose-end and lubricate the threads with a touch of oil. Push the hose over the hose-end nipple, there will be slight resistance. Slide the socket over the threads and start screwing this on by hand. Step 5 Select the correct sized spanner for your job. Tighten the socket on the hose-end until there is a gap of approximately 1mm. Tighten to align the flats for a professional finish. Remove from the vice and repeat for the opposite end.